In previous posts I have covered:
- Creating an initial Test Plan and HTTP Request sampler.
- Recording HTTP requests via the JMeter HTTP(S) Test Script Recorder (or proxy, as I prefer to call it).
- Creating a login script.
If you’ll recall from that last post, the login script wasn’t working yet. The actual login request (i.e. the submission of the login credentials as a request to the server to initiate a logged-in session) was failing because we weren’t providing it with all of the information it needed.
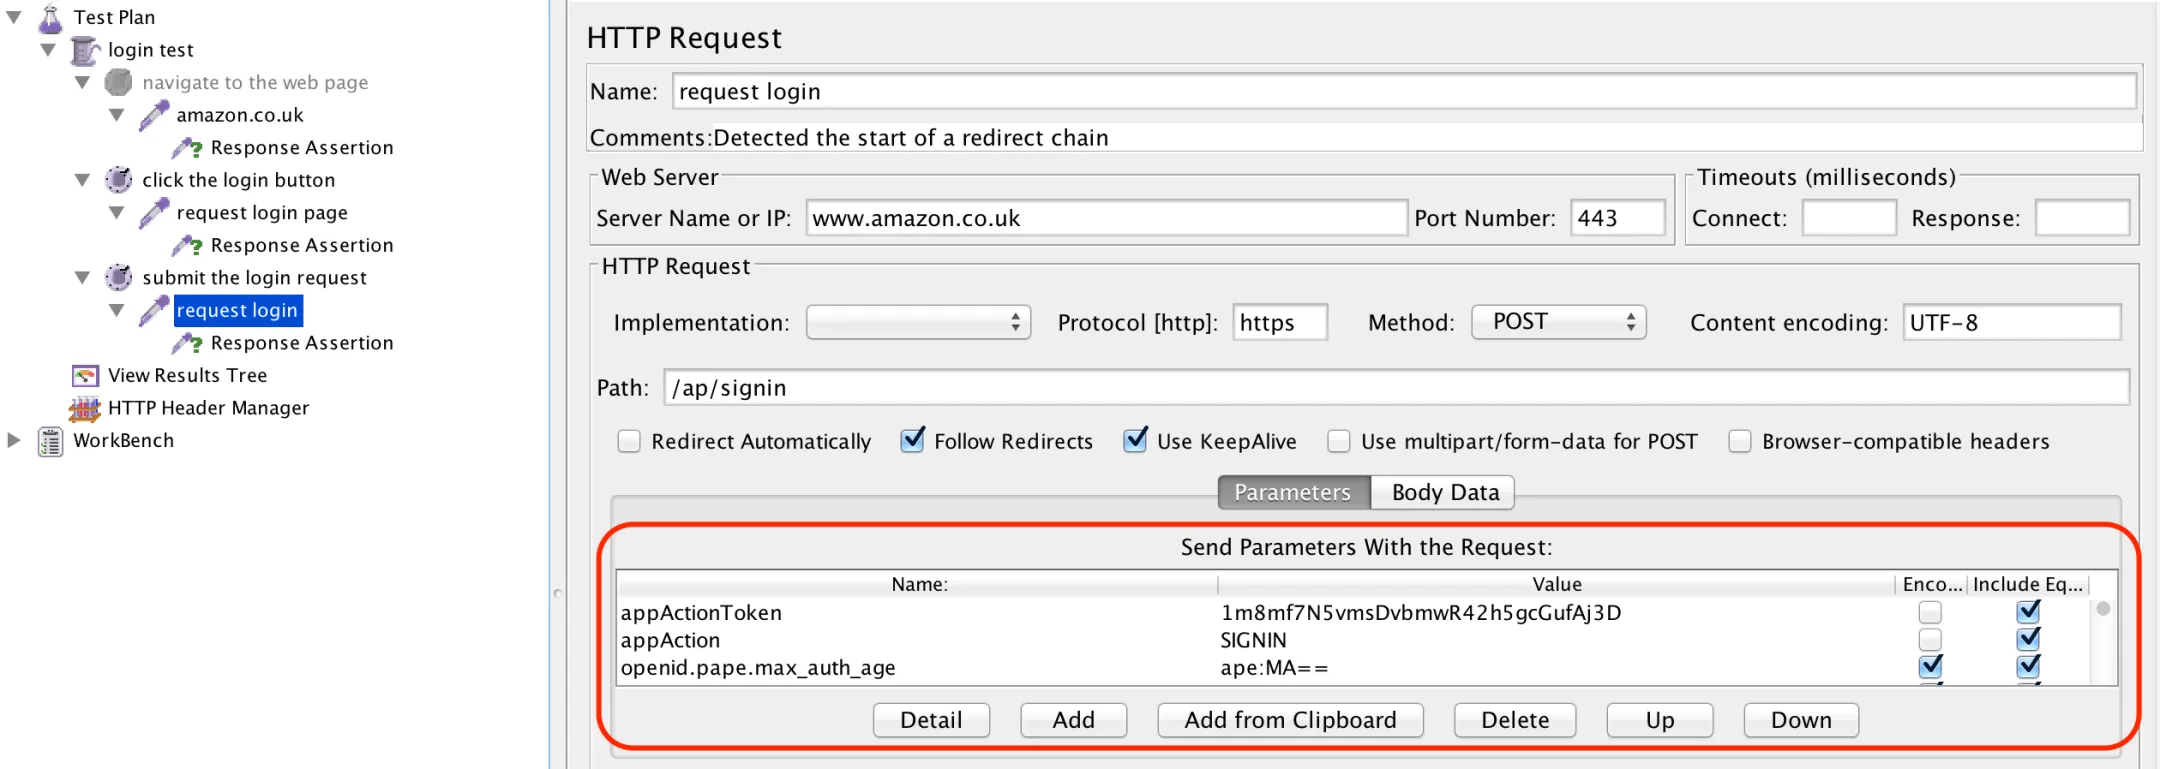
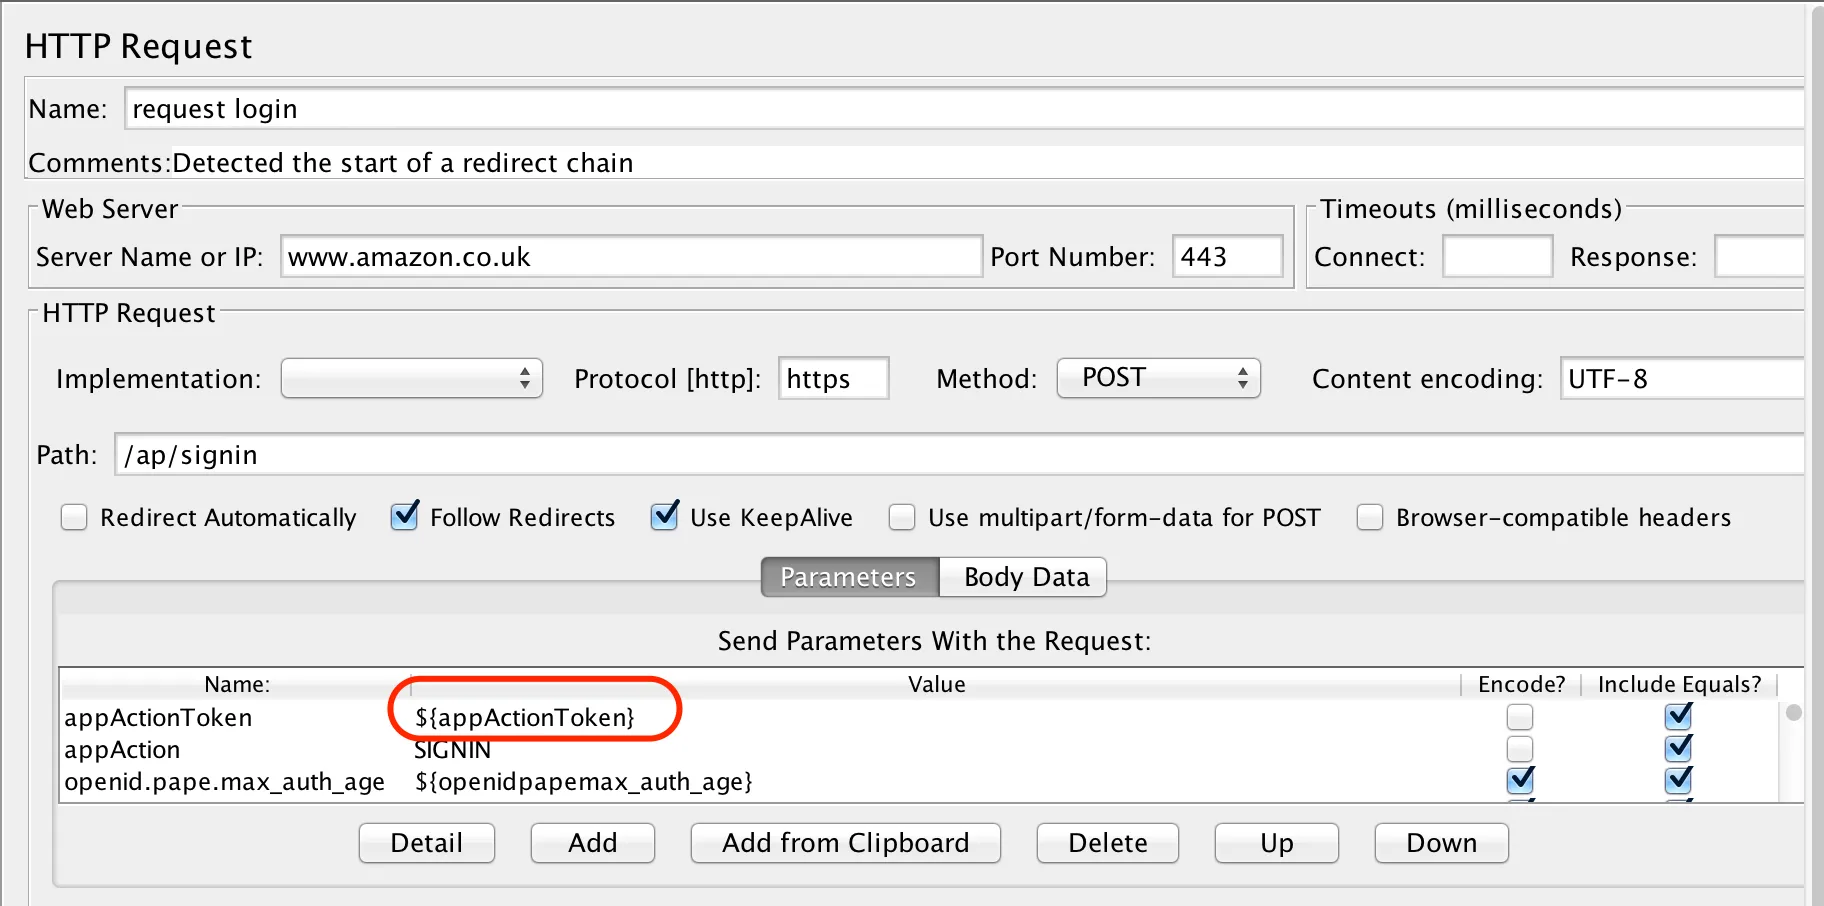
In the Send Parameters With the Request section of the HTTP Request sampler, request login, above, we can see that there’s an AppActionToken that looks as though it’s been generated by the server, probably to uniquely identify the session. If we continue to scroll down the list of parameters, we’d see that there are a number of other tokens that are required in order to successfully login:
appActionToken = 1m8mf7N5vmsDvbmwR42h5gcGufAj3D
openid.pape.max_auth_age = ape:MA==
openid.ns = ape:aHR0cDovL3NwZWNzLm9wZW5pZC5uZXQvYXV0aC8yLjA=
openid.ns.pape = ape:aHR0cDovL3NwZWNzLm9wZW5pZC5uZXQvZXh0ZW5zaW9ucy9wYXBlLzEuMA==
prevRID = ape:MTFESk4zWkIwQzhSSjg5SlQ0SjA=
pageId = ape:Z2JmbGV4
openid.identity = ape:aHR0cDovL3NwZWNzLm9wZW5pZC5uZXQvYXV0aC8yLjAvaWRlbnRpZmllcl9zZWxlY3Q=
openid.claimed_id = ape:aHR0cDovL3NwZWNzLm9wZW5pZC5uZXQvYXV0aC8yLjAvaWRlbnRpZmllcl9zZWxlY3Q=
openid.mode = ape:Y2hlY2tpZF9zZXR1cA==
openid.assoc_handle = ape:Z2JmbGV4
openid.return_to =
ape:aHR0cHM6Ly93d3cuYW1hem9uLmNvLnVrL2dwL3lvdXJzdG9yZS9ob21lP2llPVVURjgmcmVmXz1uYXZfc2lnbmlu
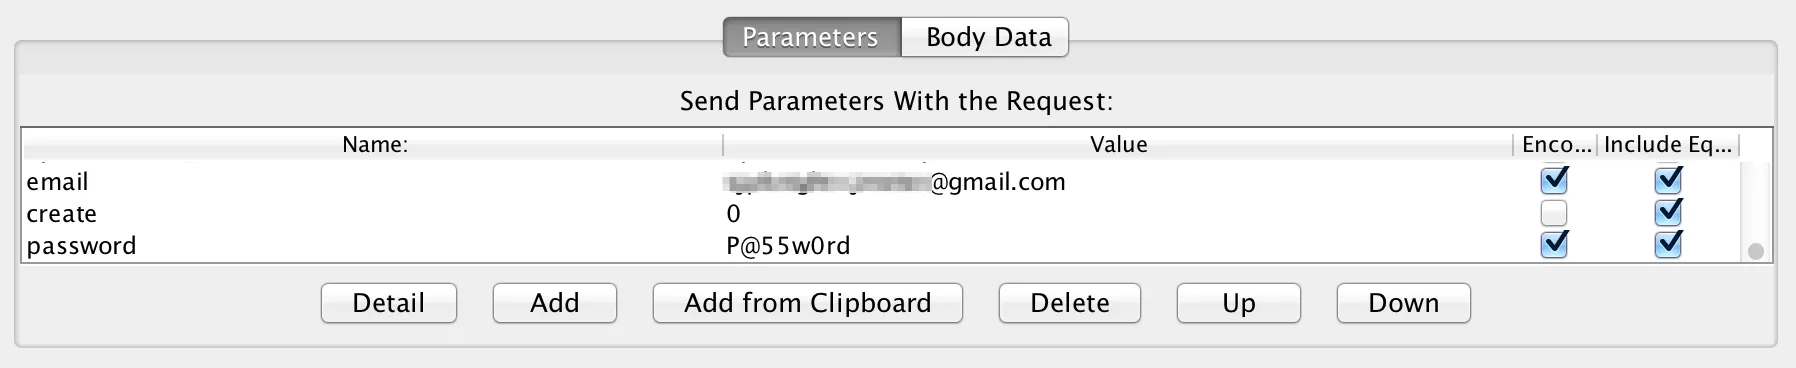
In addition to the dynamic parameters, we also need to submit the username and password, which are currently hardcoded as can be seen below.
We could parameterise these also, but I’ll talk about that another time.
So how do we go about obtaining the correct values for these parameters, such that when we send them all, along with some valid login credentials, we get a logged-in session back from the server?
Well, the first thing is to figure out from whence they came. Experience has taught me that it’s usually (though by no means always) from the immediately preceding server response. So let’s go back to the results of our test and take a look:
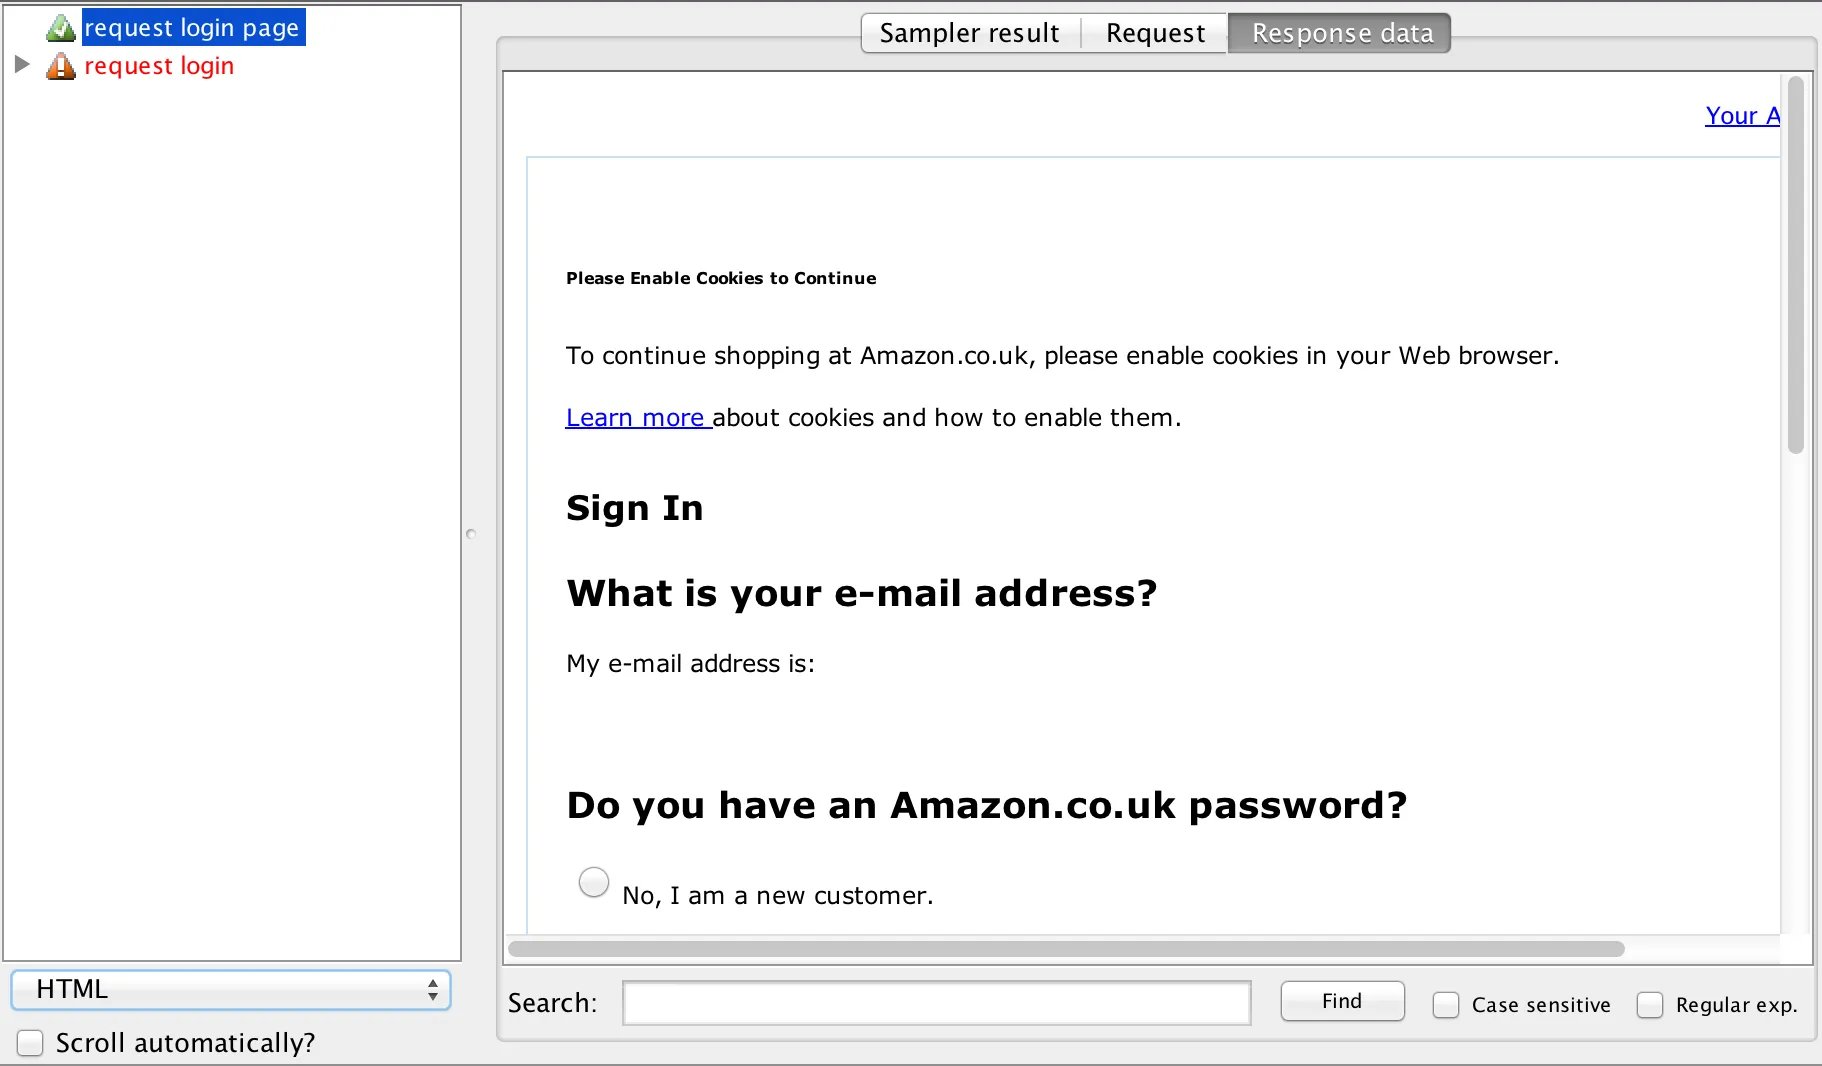
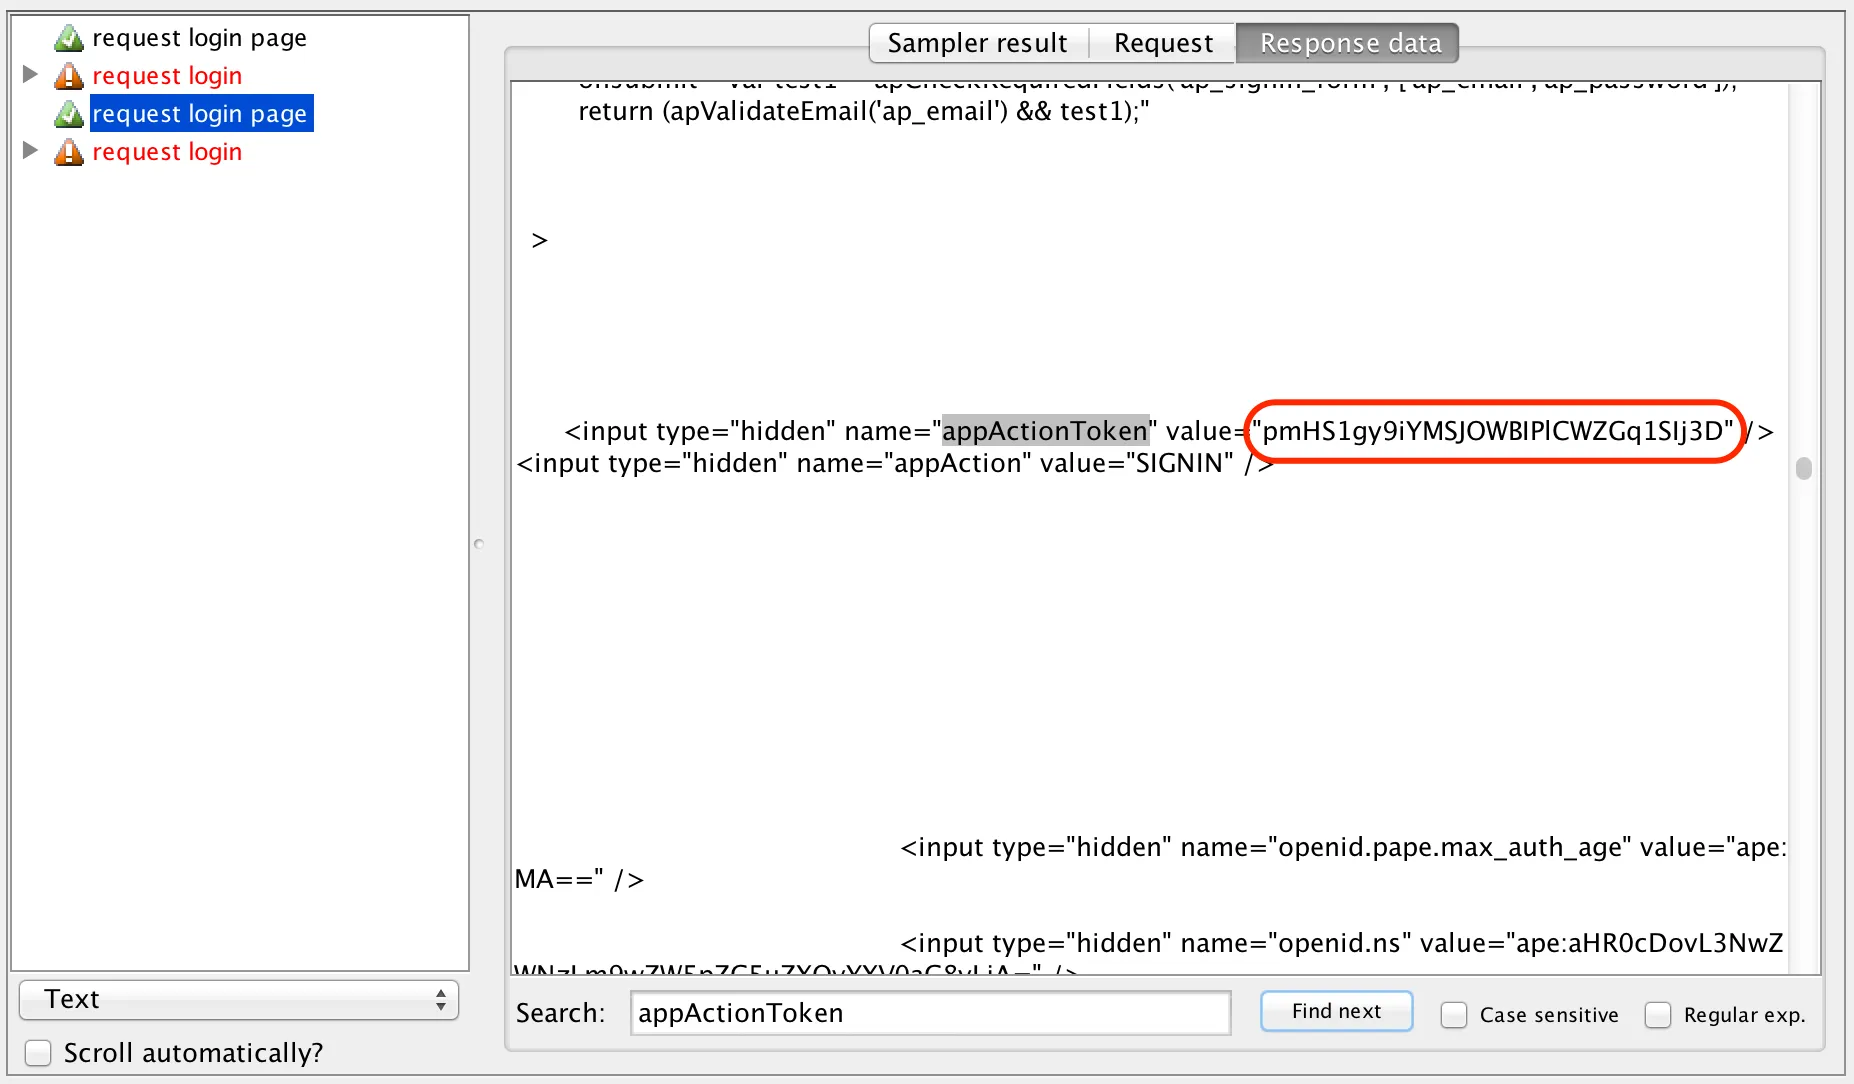
The HTML response isn’t telling us much… We need to switch to text mode, and then take a look for the parameter name. Let’s start with the appActionToken parameter:
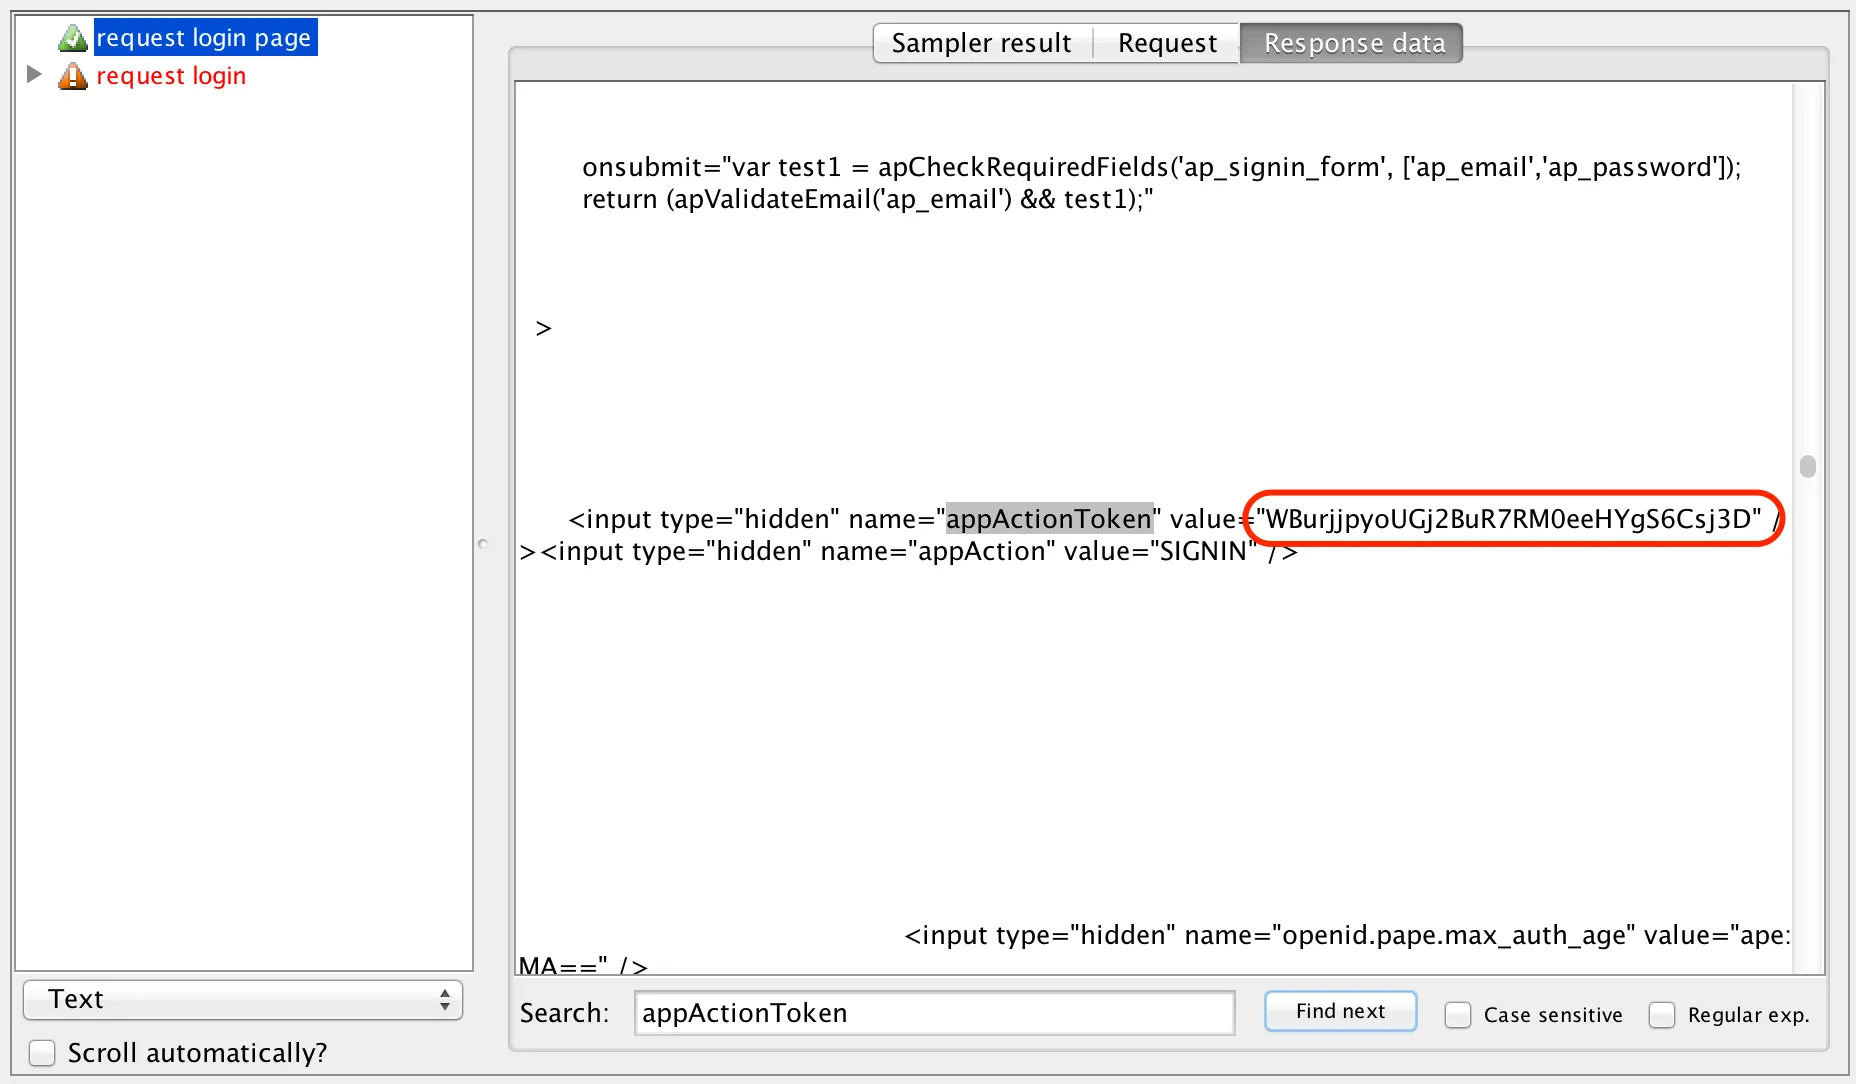
Voila! We’ve found the token, and the value. But if we run the test again, we’ll probably see a different one:
It’s a fair (in fact guaranteed) bet that we’ll find the rest of our parameters embedded within this response too.
So what we need to try and do is extract the parameters from the server response, each time we get one – and then pass it into the next request. Performance testers call this process correlation. JMeter provides us with the Regular Expression Extractor so that we can go ahead and correlate our parameters from one request/response to another.
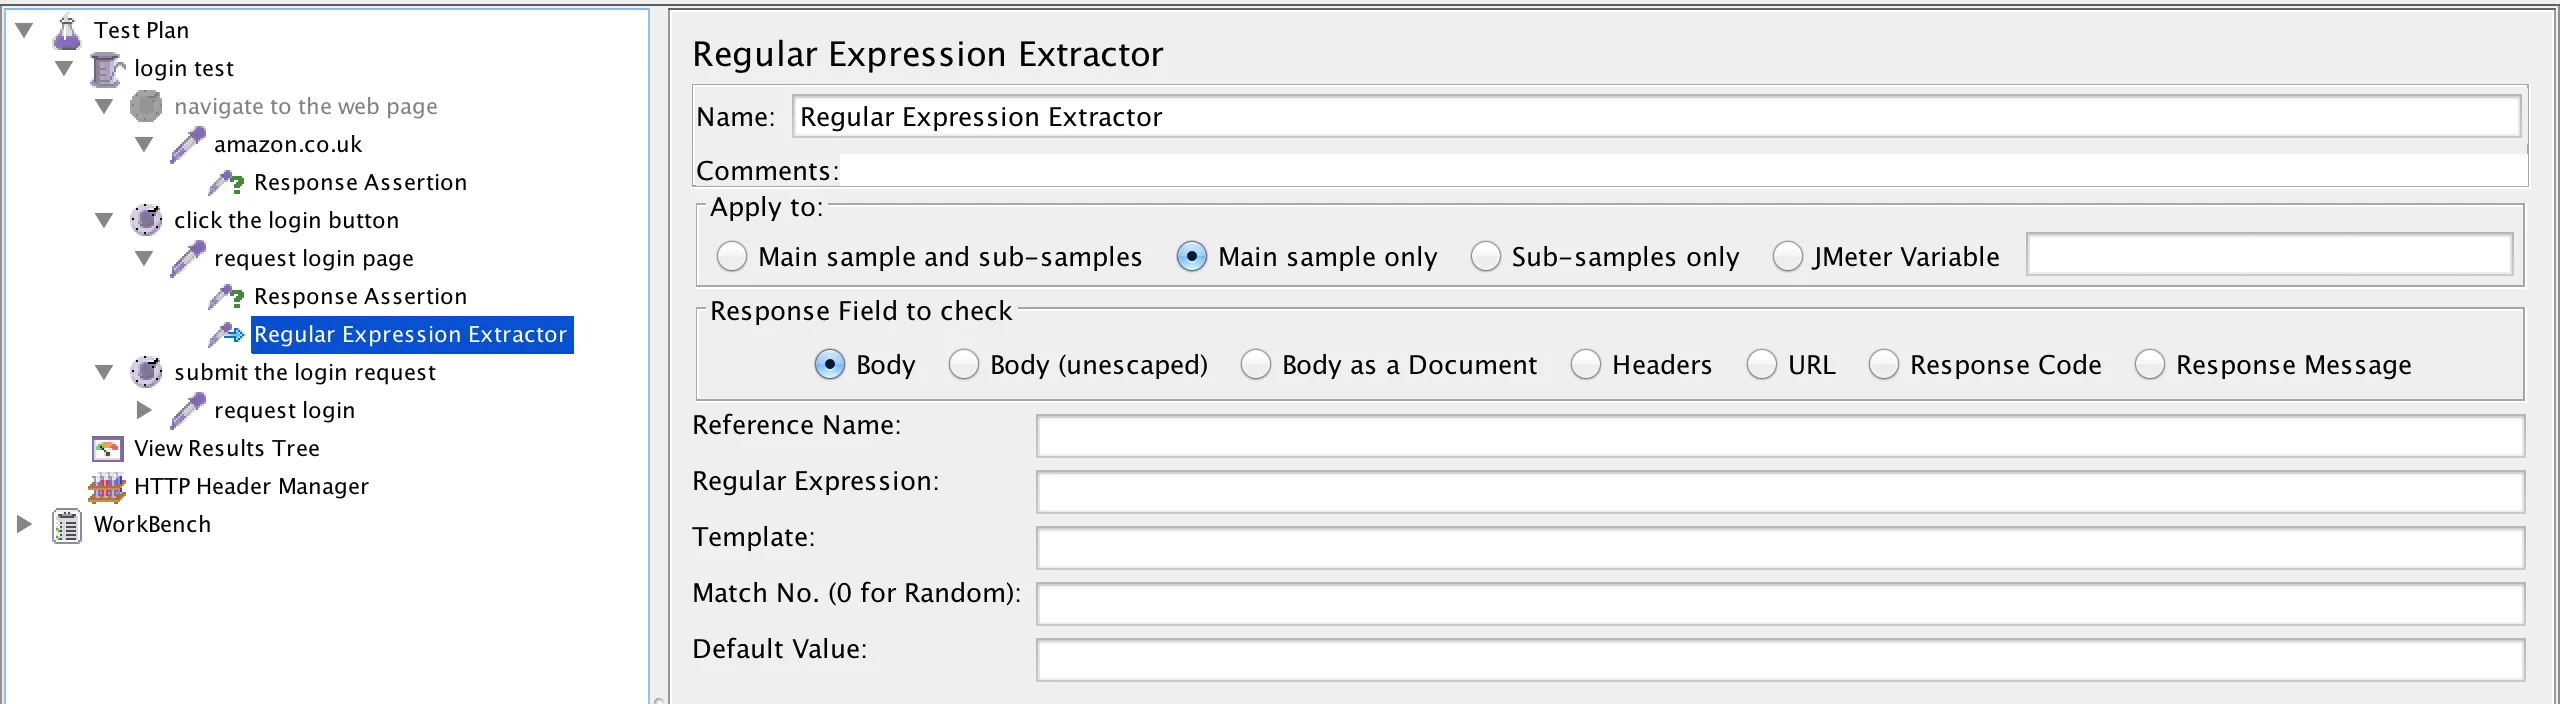
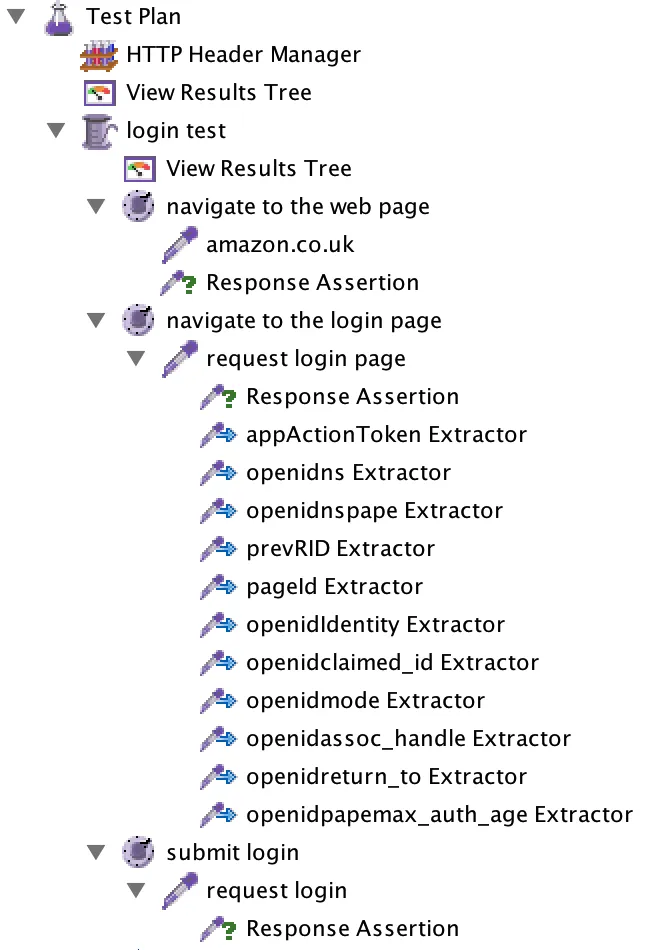
The first step is to add a Regular Expression Extractor to the request login page HTTP Sampler, by right-clicking on it and then selecting Add > Post Processors > Regular Expression Extractor, thusly:
Next we need to write some Regex with which to extract the parameter.
If, like me, the idea of writing regex makes your toes curl with horror, don’t worry. I’ll share a special piece of JMeter goodness with you. It’s the only piece of regex I’ve ever really needed to know. And it goes like this:
(.+?)
Did you get that? I’ll repeat it just in case you missed it…
(.+?)
To use this regex and get the parameter we’re looking for, I reckon something like the string below should work:
name="appActionToken" value="(.+?)" /
Trying it out in the RegExp Tester view of the response, shows that it will indeed work, since the test came back with only one match:
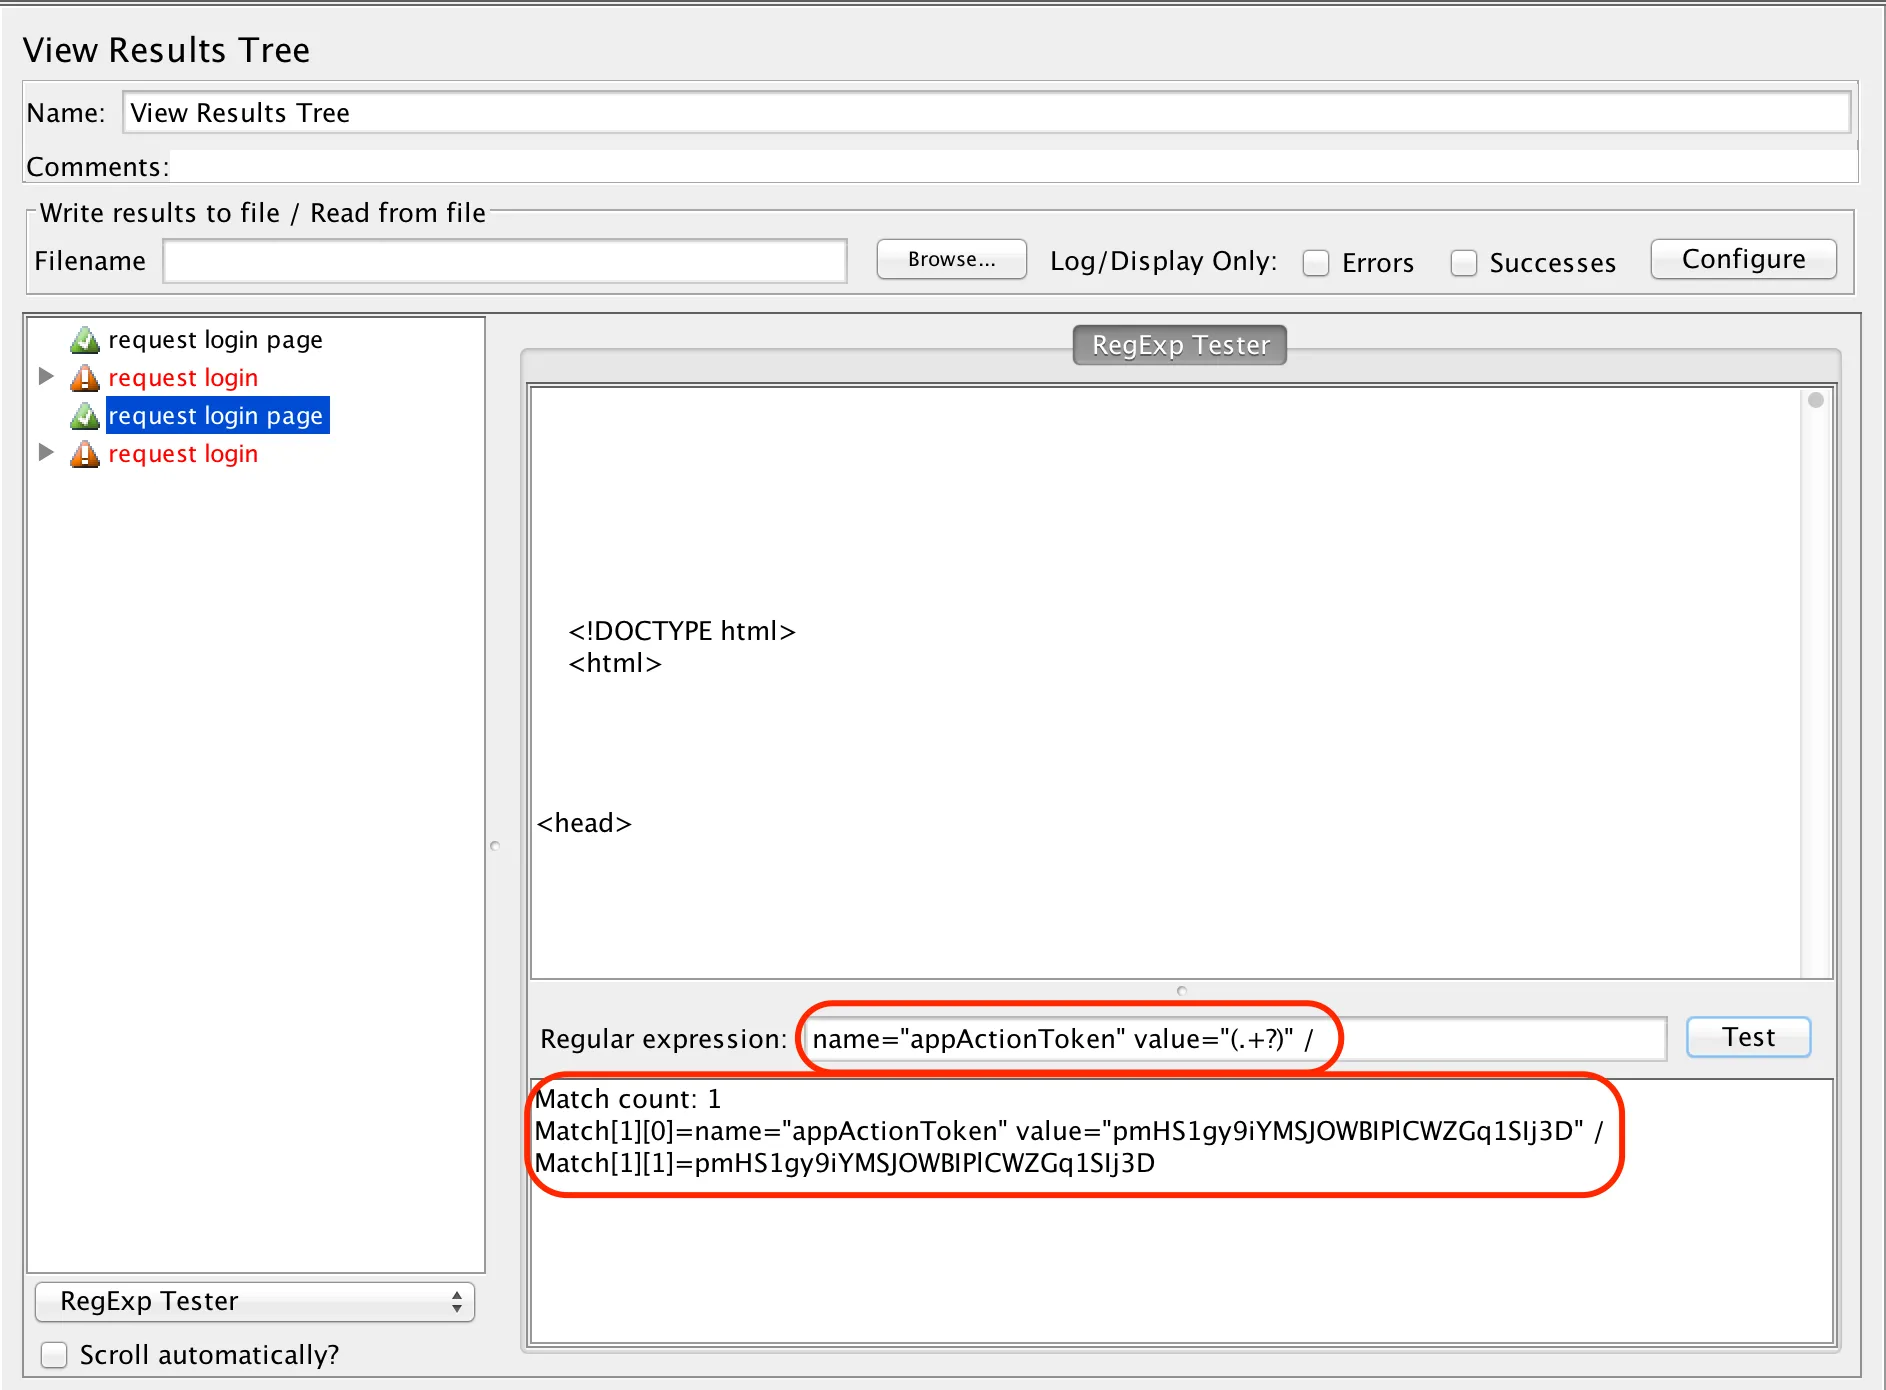
The RegExp Tester shows me how many matches the regex pattern will create, what the match is, and the value to be extracted – 1, 2 & 3 below respectively:
Match count: 1
Match[1][0]=name="appActionToken" value="pmHS1gy9iYMSJOWBIPlCWZGq1SIj3D" /
Match[1][1]=pmHS1gy9iYMSJOWBIPlCWZGq1SIj3D
What I’ve done here is, take the HTML response, and apply the simple bit of regex I described above, in order to capture only the string that we’re interested in.
<input type="hidden" name="appActionToken" value="pmHS1gy9iYMSJOWBIPlCWZGq1SIj3D" /><input type="hidden" name="appAction" value="SIGNIN" />
The “pmHS1gy9iYMSJOWBIPlCWZGq1SIj3D” bit, basically.
I’m not going to go into how the regex works, because that’s beyond the scope of this particular post. What we do need to do now is plug it into the regex extractor so that we can use it in the request login sampler.
Here’s how the finished extractor looks:
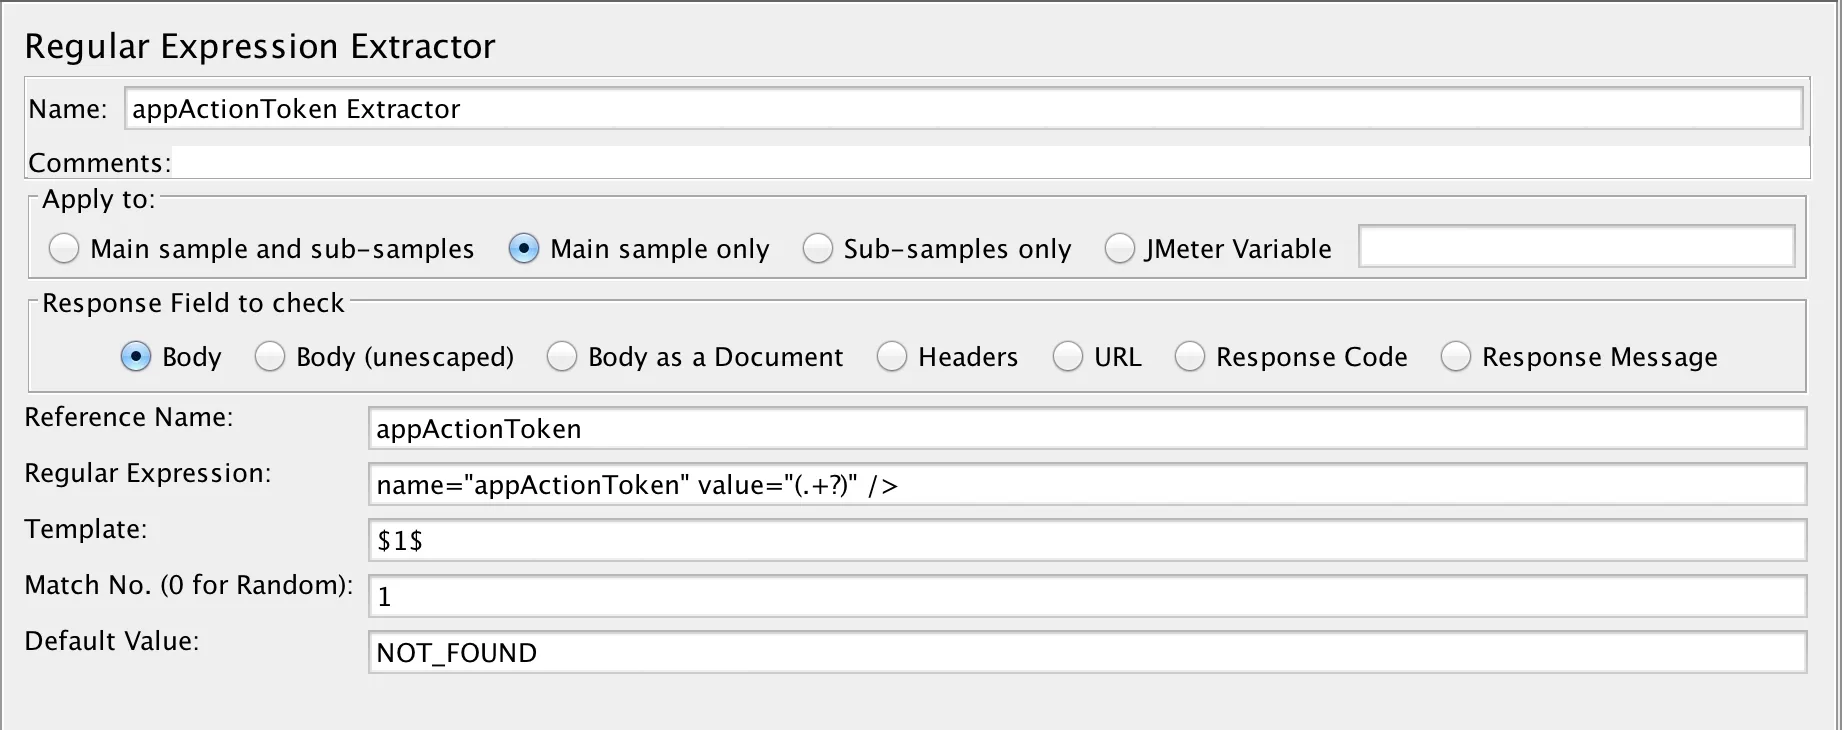
The important things to note are these:
- I’ve given the Regular Expression Extractor a meaningful name – appActionToken Extractor
- I’ve given the variable into which I want to put the extracted token a meaningful name (in the Reference Name field) – appActionToken
- The regular Expression field contains our regex – name=”appActionToken” value=”(.+?)” /
- The Template, Match No and Default Value fields are filled out more or less as per the Apache JMeter guide.
You can learn more about the Template, Match No and Default Value fields by reading through the online guide from Apache here. I’d recommend sticking with the defaults, but you may gain some mileage in experimenting with them.
Having extracted the value successfully and placed it in a JMeter variable, we now need to use the variable in the submit login sampler. We can do that by referencing the variable where the token was originally.
JMeter knows we want to use a variable when we place the name inside curly parenthesis with a leading dollar sign – ${variableName}, like the below:
With that done, we’re almost ready to go. Except, our script still won’t work because there’s those other 10 dynamic variables we need to correlate as well. Fortunately, the process is exactly the same for all of them:
Locate the variable in the preceding response – the request login page response in the case of our script. Construct the regex to extract the variable – as discussed above. Create a Regular Expression Extractor for each variable to be correlated. Refer to the extracted variable in the subsequent request – the submit login page in our example, as discussed above.
Once you’ve gone ahead and done all of that, you’ll likely end up with something that looks like the below:
And, assuming that you’ve done everything correctly, running the test again will result in the desired logged-in response from the server:
We can see above the JMeter is logged in by the “Hello, jmeter” message in the response.
We’re done! Our login script is now ready to rumble. And having covered the basics, we’re ready to tackle some more advanced JMeter topics. So stay tuned for those…